 |
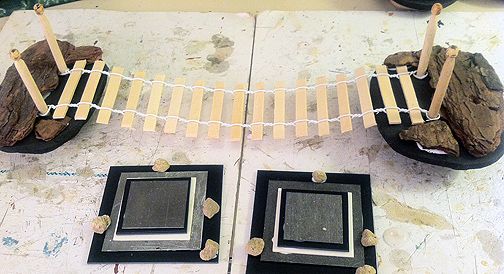
| The heavy metal bottom bases (layering of styrene and metal bases which will be the very bottom of the assembly. The bridge in the background with the pine bark pieces, as detailed below |
I mentioned in the last post the sectional "sandwiches" I was creating for the bridge to sit upon. By stacking up as many of these sections as I wanted, I could vary the height of the bridge. If you remember, the sandwich was created by using rectangular birch wood pieces from Hobby Lobby as the "bread," and 5mm black craft foam as the "meat." Like any good sandwich, the meat overhangs the bread in an irregular fashion. This varying of sizes between each of the layers will hopefully make it more realistic. I used five slices of craft foam per section, attaching them one atop the other using Tacky glue.
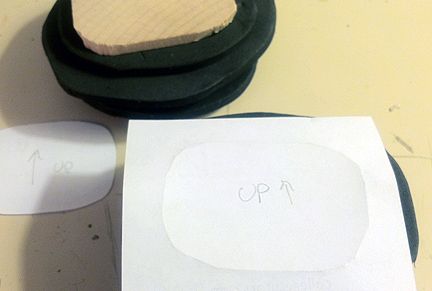 |
| Using a sheet of paper to trace the outline of each base bottom so it could get its layer of cardboard |
The next step was how to connect the sections together. I planned on attaching a metal base to the bottom of each section and earth magnets to the top of each. The strong magnets would hold the pillar of sections together (hopefully). However, to prevent a gap between the two section equal to the width of the magnet and metal base, I dug out my scrap cardboard. I searched though them until I found one of the same thickness of the metal base and magnet combined. I then took a sheet of paper and placed it on the bottom of each section, rubbing it to get the outline. This was cut out and traced on the cardboard so it would be a good match for each section. I then placed a metal base on each piece of cardboard and cut out a square hole for each to fit inside. These were then affixed to the bottom of each base using white glue, which I used because I hoped it would dry thinner than the Tacky glue and not throw off my measurements of thicknesses (if that makes sense).
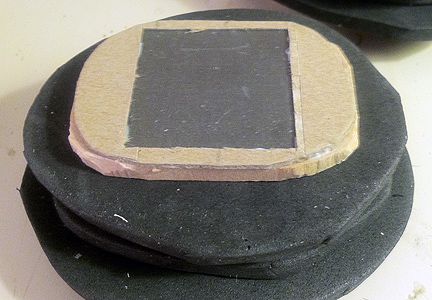 |
| The bottom of one section, with its cardboard cap and the square for the metal base cut out and base inserted |
After they were dry, I flipped them over and traced the outline of a metal base onto the top of each section. Four earth magnets were attached using two-part epoxy, which I used hoping it would be a stronger bond than white or Tacky glue. In the picture it shows just two magnets. I experimented using just two at first, but there was a slight wobble once the bridge was placed atop the stack of sections. I figured two more magnets would hold it in place more securely. You do have to press the magnets firmly down onto the wood base, as they are light enough to float atop the epoxy. Also, be careful not to place the magnets too close to each other or they will attract and move together. I also felt I would need a heavy bottom base for each pillar of sections. So, I combined a stack of metal and styrene bases which would come together to be the actual bases for the whole assembly. The bottom-most sections would sit atop these bases, which would hopefully be heavy enough to keep it from being knocked over. The beginnings of the metal bases, without earth magnets, are pictured at the top in the first photo.
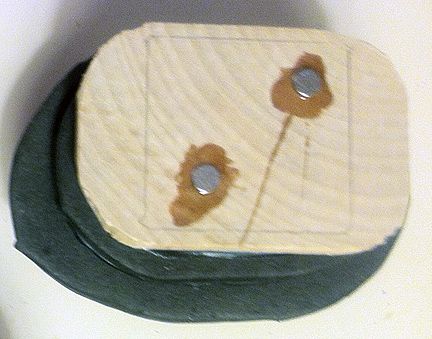 |
| The top half of one of the sectionals -- what attaches to the cardboard and metal base bottom. I used 4 earth magnets, though two are pictured at this stage. |
I'd been looking at the bridge assembly itself -- the topmost section -- and was thinking it needed a little more spicing up. The craft foam ovals were just too bland and not "cliff-like" enough. I decided to find some pine bark pieces that would fit and Tacky glue them to the top level of craft foam. I sorted through the pieces I had left over from my pine bark cliffs, until I found several that were thin enough and roughly the correct shape. I trimmed them up with wire cutters and used generous amounts of Tacky glue to affix them to the top level of craft foam.
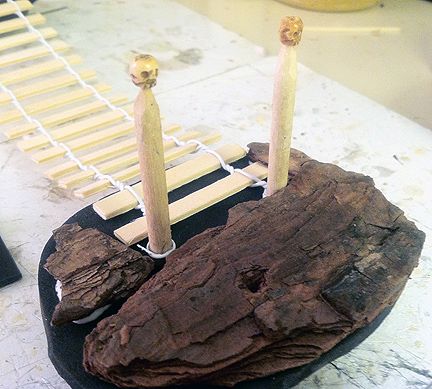 |
| A close up of one end of the bridge, with its pine bark sections Tacky glued to the craft foam top. You can also see the skull beads atop each post. |
Once that was done, and the metal bases were affixed to the bottom and the magnets atop, it was time for painting. I'd decided to give them a black spray primer coat first. I found some old plastic cups to tape each to so it would be elevated and easier to spray underneath. I sprayed once, let them dry, flipped them upside down, and sprayed again.
The next step would be texturing and flocking the rock surfaces.
No comments:
Post a Comment