Monday, April 22, 2024

Chopper Down...Salvage!! Post-Apoc Scenario

    One of the many 'bad guys' that showed up to attack the players -- a Machine Patrol bot
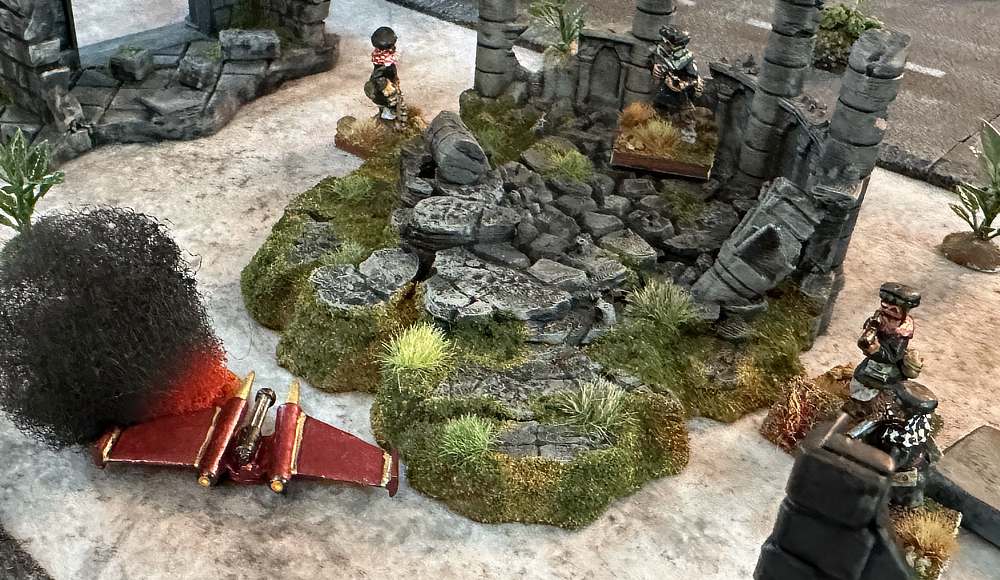
I'd been waiting for an available Sunday evening to run the sixth scenario of our post-apocalyptic campaign. After the cooperative game of "Where the Dark Things Gather," this would be a competitive one. In the beginning, players were avoiding shooting each other. Eventually, though, they got into the spirit of it and began blazing away at each other around the smouldering, downed helicopter. The back story was that their survivor gang had seen a military chopper go down but with no resulting explosion. They surmised the pilot must have auto-rotated a soft enough landing, which meant one thing: available salvage!

    The players map out their routes towards the downed chopper in the middle of the board
Only four of my players were available, so I sat out and GM'd the affair. Each started in their respective corner back edge and began moving towards the center of the board where my recently-constructed downed chopper terrain piece was placed. I had six potential salvage spots, two on the helicopter's base and four flung out 10" in each of the the cardinal directions. The center spot was an intersection in a heavily damaged section of a city. Wrecked vehicles blocked sight lines along the roads leading to the chopper. The rest of the board was filled with my ruined buildings and urban scatter that I have been working steadily on now for a couple years.

    The view from my end of the table with the Bass Reeves on the left and the Bucknuts the right
The players were unaware that I had increased the chance of arrival of wandering "bad guys." Normally, after each 10% casualties on the board, something appears -- usually a Machines Scout Bot. As each
subsequent 10% level is reached, they go up to a Patrol Bot, then Military Bot, and (maybe one day) Destroyer Bot. I gave a 50/50 chance that the Scout Bot would be an aerial drone instead. Same stats, but flying. I also gave a 50/50 chance it would be a ground creature drawn by the noise of the gunfire. I had my giant rats (ROUS's - Rodents Of Unusual Size) and feral dogs out, but only the rats arrived other than machines. At one point, I had four bad guys on the board, but it was usually just one or two at a time. In addition, before the 10% casualty level was reached, I gave a 20% chance a bad guy would show up.

    As the Followers of the Dark Prophet were sneaking forward, a Scout Drone appeared in their rear
A new innovation this time (that I will likely continue using), was that I had the players "roll off" to see whose sector the bad guy showed up in. Low roller got the creature or machine. Everyone except Joel had a bad guy show up in their sector. Some of them did no damage to the players -- the Bass Reeves killed the ROUS with a shotgun blast after its first move couldn't contact one of their survivors. Others suffered heavily. The lethal Bucknuts lost two of their four men to a rabid ROUS. Allen's Followers of the Dark Prophet had two guys wounded and downed, but each time luckily drew an Ace or Queen of Hearts next turn to recover.

    Brutus & Jackie of the Bucknuts use the available cover of vehicle wrecks to close in on the chopper
On the section of the board closest to me, the Bucknuts and Bass Reeves deployed opposite each other. They did not advance forward, but both began to shift laterally towards the center. The Bucknuts were the first to dash someone forward to snag salvage that had been flung from the wreck. The Bass Reeves sent Dreadz climbing up the tall, corner ruin to obtain a great sniper spot. He held off on shooting any of the rival survivors until the Bass Reeves were attacked first. Dreadz was also lucky to move early in the turn, when he began his climb. Shortly after he scrambled up a couple levels, a ROUS appeared well within range of where he'd been standing. Frustrated by the disappearance of the human it had (apparently) been stalking, it charged across to the gang's leader, Big Bass. Hearing it skittering towards him, but coming up short, Big Bass stepped around the corner of a building and blasted it with his shotgun. It gave a squeal and went down for good, relegated from a threat to rat burgers with one shot!

    The Bass Reeves stalk laterally through the ruins, using the walls of buildings as cover
Across from the Bass Reeves, firing broke out as the Followers of the Dark Prophet reacted to the sudden appearance of a Scout Drone Bot from behind them. It whirred forward and blasted away, wounding one of the dark-robed survivors. The remaining three members whirled round and blasted away at the drone, Eventually, Dafyd hit a vital spot on the machine and it dropped to the ground. More salvage! Across from Allen's troops, his brother Joels' F Troop was taking advantage of the distraction provided by the drone to advance closer to the smouldering wreck. No signs could be seen of any survivors. Had they escaped on foot, or had the rats gotten to them? No one was sure, but their looked to be all kinds of things to loot from the helicopter -- ammunition boxes, rations, medical kits, and electronic components.

    The Scout Drone is no match for the firepower of the Followers of the Dark Prophet!
At this point, the lure of avarice took over. The survivor gangs ended their unspoken truce and began firing at each other. Ironically, it was Joel's F Troop who fired the first shot -- at his brother! We joke how Allen's wife admonishes Joel every Sunday evening when he picks up her hubby to "not kill your brother!" So, it is a running gag that sometimes they follow her directives and other times all bets are off. F Troop had moved Pvt. Picnic up near the chopper while the other three remained behind vehicles and walls to cover him. Not to be beaten to the punch, Allen moved Dafyd (who'd knocked down the drone) up to contest the salvage. Shots were fired, but both men remained standing.

    A standoff between Bucknut's Jackie and Amram of the Followers, each wanting the salvage
Allen took that as cue to sprint Amram towards the metal box that could be seen on the ground, just feet away from the helicopter. Amram was astonished when Jackie ran up, as well. Both looked from the metal box to the other, sizing each other up. Shots rang out all around them as men and women from all four factions began firing at each other. The "Bad Guys" added to the cacophony as a Patrol Bot clomped onto the board's far edge. Its machine gun had plenty of range, though, and it blasted away and another of the Followers of the Dark Prophet fell to the ground wounded. 

    The firefight around the chopper is truly underway, with all four factions firing at each other
Someone fired at Ned of the Bass Reeves, and that gang of survivors joined in the shooting, as well. Tosh took advantage of the confusion to sprint forward and snag the closest piece of salvage, a duffel bag that looked as if it had been tossed from the helicopter on impact. The players had been careful in the early turns, and minimized exposing their survivors to enemy fire. However, risks were taken now as the desire to snatch up the loot before their rivals overcame their caution. One of the early successes, Wrich of the Bucknuts, had dashed back to what he thought was the safety of the buildings after snatching up a box of ammunition he'd seen lying in the street. He ducked behind the walls, panting from the exertion, relieved that he was no longer in the open street.

    Brutus felled by an ROUS - the second Bucknut to be knocked out of action by the hulking beast
A high pitched shreik from behind him startled Wrich. He turned, horrified, as a ROUS bore down on him. He spun, leveling his rifle, but too late. The giant rat was upon him and clamped him in his jaws. The beast shook him back and forth battering his head several times against the stone walls. Wrich went limp and lost consciousness. In the ruins of the next building over, Brutus saw the attack and inadvertently shouted, "Jesus H. Christ!" The rat heard him, dropped the unmoving prey from its jaws and began skittering towards Brutus. The large man screamed in terror and tried to slam home the magazine he'd been loading into his weapon. He fumbled and the metal magazine clattered to the ground. The ROUS launched itself at Brutus and seized him him by the shoulder. Brutus was a big man, but the rat's weighed dashed him to the ground, senseless.

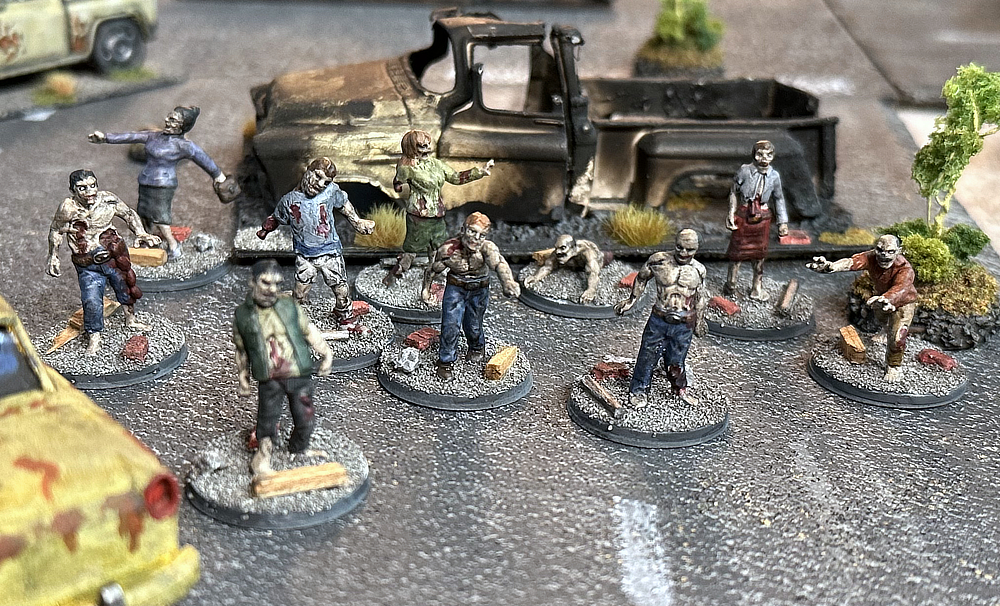
    As bullets from rival factions ricochet all around, F Troop hunkers behind a burnt-out pickup truck
All the shouting drew the attention of Coach Coop, the Bucknuts leader. He shifted to get a better angle on the rat and let loose a burst of his assault rifle. The creature turned and bared its bloody jaws at him. Coop cursed and drew a bead on its beady eyes and fired twice. The rat let out its last squeal and fell dead. Coop called to Jackie to fall back, and moved up to see if his friend was still alive. Many of the survivors looked up as another Scout Drone whirred overhead, the machine's guns blazing at their human foes. Bullets kicked up all around F Troop's Pvt. Picnic and he fell to the ground, clutching his shoulder. Meanwhile, the Followers of the Dark Prophet called to each other and began to withdraw from the open streets, moving through the ruins towards the table edge. 

    Bucknut leader Coach Coop grimaces at his losses as Joel surveys the field and does likewise
The casualties and increasing number of machines and feral denizens of the city convinced the factions it was time to pull back. Those that could grab some last salvage or supplies did so, while hugging the cover of the ruined buildings. All of them had taken hits and most had at least one of their four out of action. The Bucknuts and F Troop were each down to half strength. Carrying their wounded, they withdrew from the bloodied intersection. Each hoped that the blood spilled was worth the rewards they had gained.

   F Troop utilizes the cover of the ruins and wrecks to move up early in the game
I felt the scenario had started out a little slow, but it picked up speed and was a blazing hot mess by the end. The players were laughing and having a good time spraying their rivals with gunfire at each opportunity. I really liked giving the players "control" over where the enemies appeared by having them roll off. Allen saved his worst rolls for then, but in general his Followers of the Dark Prophet came on top. They picked up two caches of supplies, knocked out a drone, two rivals (Ned of the Bass Reeves and Pvt. Angel of F Troop), and escaped with all four members off-board. His success may lead to future challenges, though, as I give players who lost a member to enemy fire bonus victory points in subsequent missions for exacting revenge and taking out one of theirs.

    Wrich of the Bucknuts creeps closer to the salvage at his feet, while keeping an eye out for enemy
Joel's F Troop took it on the chin, again. I'm not sure why, but fortune has not favored this former army unit in its post-apocalyptic missions. Joel escaped with no supplies and lost two members (both of whom fortunately ended up being just "winged" and okay for the next scenario). The rat-ravaged Bucknuts discovered a weakness in their formerly lethal, long-range tactics. They lost two members to an ROUS, Wrich being just "winged" while fleshy Brutus will recover with some rest time. They did kill one rat and escape with one cache of supplies, so all was not lost.

    Pvt. Picnic goes down to a Machines Scout Drone as F Troops sour luck in scenarios continues
Mike W's Bass Reeves picked up three caches of supplies (which includes carving off enough rat burgers for a feast). They carried Ned off the battlefield (who fortunately was also just "winged") and killed the ROUS. All in all, the players rolled VERY well in their post-battle recoveries. It could have been much worse for them. Everyone seemed to have a good time. Now that I retire in just over a month, we hopefully will be playing more post-apocalyptic scenarios soon. Then again, don't I say that every time after every game??

    The streets are silent as the Machines scour the area looking for human survivors to terminate
Miniature Painting & Purchasing Tally for 2024
  • Miniatures acquired in 2024: 64
  • Miniatures painted in 2024: 57

Sunday, April 21, 2024

Zombies for County Road Z

    My first-ever painted zombies -- 3-D prints from JS Wargamer Printing (STLs by WhiteBeardMinis)
I have been gaming since my teens, and now in my 60s, I honestly believe that this is the first batch of zombies I have ever painted. I don't dislike zombie games, fiction or movies. I love Will Smith's "I am Legend," enjoyed the heck out of "The Last of Us," and even liked "World War Z." I just never was bitten (ha, ha) by the zombie bug to do it as a project. However, reading about the upcoming release of the County Road Z rules from Modiphius intrigued me. 

The rules are solo or coop and have the players living in "flyover country" -- the Great Plains states out West (from where I am). The idea is that the more densely populated Eastern and Midwest of the country are being overrun by the zombie epidemic. With fewer people, and thus fewer zombies, the folks out west have a fighting chance. My own personal take for my campaign is that the players have packed up in vehicles and are heading west. I'm going to modify the "Road Trip" campaign in the rules, and actually bolt on Gaslands Refueled rules when vehicles are involved in a tabletop game.

    Closeup of three of the zombies - I like the Frankenstein looking on in the middle best!
I can easily use my 28mm post-apocalyptic miniatures for my players. However, once I decided to do this, I didn't own any zombie miniatures at all. Like I said, never bitten! Knowing that I'd need a lot, I reached out to John Leahy of JS Wargamer Printing. He sent me a couple of pics of what he could print up for me and I gave him the thumbs up. I picked them up in March at Cincycon 2024. I bought two packs of 10. The first were modern civilian looking zombies from WhiteBeardMinis. The others were "infected" zombies from the Kraken Apocalypse Dawn kickstarter

My first thought upon examining them once I got home was that they looked small and thin compared to my 28mm metal miniatures. I figured maybe that was due to the white plastic material they were printed from and that they might look chunkier once painted up. Seeing detail as opposed to an off-white blob might give the figures the appearance of more heft. Either way, I don't plan on intermixing them with other manufacturers' zombies, so this shouldn't be a problem. Or, worse comes to worse, I can use the 3-D printed figures as "passive" zombies and switch to bigger ones when they switch to "aggressive" mode. In the game, zombies are activated by the presence of player characters or the noise they generate. Otherwise, if not activated, they patrol the tabletop randomly.

    The half a zombie crawling along the pavement is a nice tough, I think!
I decided to use round plastic bases and model glue to attach them to it. I am worried that the thin legs or ankles may prove to be fragile on the tabletop, so I didn't want a heavy base providing any torque or resistance to the minis being picked up and moved. We shall see how they stand up to the rigors of a game with them being moved about the table multiple times. To hopefully give them more strength, I spray primed them with Krylon Fusion Acrylic black paint. I then went over them with my usual 50/50 black paint and water.  I have never mastered the black prime and dry brush speed painting method used by many gamers, though. So, it was then on to painting them in my standard block painting method.

I used a craft paint called "Wild Rice" (a light tan) for the skin. I figured with no blood flowing beneath the skin, the zombies would lose the ruddy color of typical Caucasian flesh. So, they would be very pale. Jenny asked if I was going to give them greenish skin, but I said no. I don't buy into the rotting green flesh look of zombies from some movies...ha, ha! A black wash at the end should make them look suitably corpse like, I hoped.

    I tried to "junk up" the bases a bit more on these to give it that modern apocalyptic feel
After the flesh, I painted the clothes in various colors. I had to be careful to paint around the tears or holes in the clothes. I was pleasantly surprised that the 3-D prints had enough raised detail to accept dry brushing for the clothes. I was worried it would be too smooth. I added some more details on certain figs, like belts, buckles, and such. However, these were very...ahem, shall I say "bare bones" sculpts with not a lot of equipment. For the eyes, I did a did my usual black socket with white inside, but didn't paint the iris. They were left with white eye sockets, as is sometimes depicted in zombie artwork. Unlike in most figures, I used a dark red brown on the mouths. After finishing that step, I was very worried they would look too cartoonish. I was happy that the heavy black wash softened the sharp contrast between the pale skin and reddish mouths and lips.

The figures were finished when I did the dark black wash -- a 50/50 mix of water with Vallejo black vehicle wash. It was at this stage that I finally decided I was happy with how the zombies were looking. The wash gave their skin a grayish look that seemed to fit for the walking dead. I can't claim to have seen many dead bodies or anything, but it looked more believable than they had before. The final step was to do the flocking. I decided to take a page from my recent Sci-Fi flocking and use Woodland Scenices Fine Blended Gray Ballast with bricks, rubble, and various other trash on the bases. I like how the Sci-Fi figs look, but wanted the bases to look even more junked up.

    Another look at the first ten zombies of my hopefully, soon-to-be horde...

I'm curious to hear what you guys think of my first-ever batch of zombies. I probably need at least two more batches before I can play a game. My friend Mike S is also apparently painting zombies, using the figures from the Zombiecide game. If I like how his look, I may have him bring them and use his for the "aggressive zombies" and mine for the ones still in passive mode. So, stay tuned for more from my newest project, County Road Z!

Miniature Painting & Purchasing Tally for 2024

  • Miniatures acquired in 2024: 64
  • Miniatures painted in 2024: 57


Sunday, April 14, 2024

Purchases from DayCon 2024 (More 3-D printed Goodies!)


    Some 1:50 scale 3-D printed vehicles that I purchased at DayCon 2024 from Diabolical Terrain
I went to DayCon 2024 this past weekend, looking forward to Adrian John's Saga tournament. I was also looking forward to Diabolical Terrain being there, as well. Ron has been a regular vendor at DayCon and makes it to Advance the Colors in Springfield, OH, as well. I have purchased a number of his 3-D printed items and his prints are always of high quality. Lots of 3-D printed scatter or terrain has the little ridge lines, but his are almost always smooth and clean. 

One of the main things I wanted to see was his collection of 1:50 vehicles meant for modern or post-apocalyptic games. I brought along one of my 1:48 scale die cast vehicles that I'd purchased for my upcoming County Road Z games to see how they matched size-wise. They definitely looked close enough. Ron was having a buy one, get one free sale, so I picked up two land cruiser jeeps and two SUVs. My recent die cast purchases included pickup trucks and vans, mostly. So, these would round out choices for my players as their "ride" in the games I'm planning.

    Some more Sci-Fi scatter terrain that I picked up from Diabolical Terrain at the show
A couple posts ago, I had featured some of his Sci-Fi scatter terrain. I saw more pieces that I hadn't seen before, so picked up a good double handful of them, as well. I really liked the small ones that looked like...um, not sure what they were. But they looked science-fictiony! Ha, ha! These could be power stations or whatever, so they'll come in handy to make my Xenos Rampant games look better.

    Rocky formations of various sizes that caught my eye at the convention - they should paint up easily!
Finally, Diabolical Terrain's booth had a large selection of rocky outcrops of various sizes. I was drawn to the really big ones, but decided instead to purchase more of the small and medium sized ones. These will really make a tabletop look more wild and foreboding. I'm drawn between basing them on plastic styrene or just painting them up free-standing. If I don't put them on a base it will likely be harder to add various bits of vegetation around them, which I think will really make them blend in well on the battlefield.

    10-drawer organizer that I picked up from Container Store to house my scatter terrain
With retirement only about five weeks away, I wouldn't be surprised to see these get painted up sooner rather than later. Where will I store all this stuff? Well, I recently made another purchase to help out with that. I went to Container Store and found a standing cart with 10 drawers to store my scatter terrain. I put white felt on the bottom of each drawer to keep it from moving around, and didn't install the clips that prevent the drawer from coming out. That way, I can just pull out the drawer and walk it over to the tabletop to help with setting up. I liked this cart so much I am thinking of going out and buying a second one! Not sure if Jenny will like how the gaming closet is migrating outside its double doors and taking over the basement, though...ha, ha! We shall see. I put a lot of things in the cart that I might put back onto the shelves in my gaming closet. There's a lot more free space in there than before!


    A closeup of one of the drawers already filled up with scatter terrain

What's next on my painting desk? Two things are primed are started, currently. I picked out a bunch of miscellaneous items from the Terrain Crate uber-box I'd purchased at a flea market from my friend Bryan Borgman. I'll need these for objective tokens for County Road Z games. So, they are black primed and sitting on my desk alongside my first batch of 3-D printed zombies. I even have "flesh" painted on those, so my next update will likely include the first zombies I have ever painted up...

Miniature Painting & Purchasing Tally for 2024

  • Miniatures acquired in 2024: 64
  • Miniatures painted in 2024: 47

Saturday, April 13, 2024

Thracian Saga Army (finally) Complete!

    The last six figures for my 28mm Thracian Saga army from Crusader Miniatures
Just in time to participate in Adrian John and Jim Beegan's Saga tournament at DayCon 2024, I finished my final batch of Thracian infantry this week. I began playing this army before it was finished because it was easy to proxy my Dark Age Picts as Ancient Thracian barbarians. Both are known for their colorful cloaks and tribal look, so I figured it was a natural. Now, I finally have enough for six points of all Thracians with their equally colorful cloaks, beards, javelins, and huge chopping weapons known as rhomphaia. 

    A rhomphaia-armed warrior and a javelin man - I am not going to miss painting Thracian cloaks!
All of the figures from this army come from Crusader Miniatures, who have an amazing selection of 28mm Ancient miniatures. From my initial purchase, I have maybe 10 or so figures left unpainted. So, I am fairly confident that I am finally done painting for this army, though. My ratio that I have fielded so far for my Thracian warriors is 1/3 rhomphaia and 2/3 javelins. One day, I may paint up more of the choppers. However, I think it is easy enough to mix in a few javelin-armed figures into a mostly rhomphaia armed unit. Now, if the rules writers one day "nerf" javelin armed troops and I decide that I want more choppers in my list, I can always pick up another pack or two. The ever-friendly and convenient Badger Games shows up at many of the big events and carry Ancient Thracians (that's where I bought mine from!). They were very generous with their prize support for last year's Advance the Colors Saga tournaments, so I will continue to patronize them -- and encourage others to do so!

    I thought this final batch turned out nicely -- I particularly like the guy on the left
This batch contained my last three rhomphaia figures that I'd purchased and three of the unpainted javelin-armed ones. I thought about painting up some of the figures from the command pack, instead. However, I like to save extras of those for Saga warlord stands that I paint up and give away as prizes. Speaking of which, one of my projects in the near-future will be to paint up two command stands for the Saga tournaments that Saga Ohio is running at Origins Game Fair this June 19-23 in Columbus, OH. Thanks to Rusty Parker, Dan Neal, Joe Dihrkop, Lee Parker, and James Tolbert for organizing and running two tournaments there (Friday and Saturday -- and a teaching and open play session on Thursday).

I have less than a dozen figures left after painting this army, I probably won't do those...yet!
As usual, I replaced the lead spears with wire spears from Lon Weiss at Brigade Games. I also chose the javelin-armed poses that allow me to epoxy the butt of the spear onto the base of the figure, in addition to the hand. I feel that separate weapons should always try for two points of contact to get a good bond. I also shave off some of the left forearm with an X-acto knife to give a flat surface to epoxy the crescent shaped wicker shield onto. Once all the gluing was done, I brushed primed them white (as usual). As with the other Thracians, I chose mostly faded colors for the tunics. On the other hand, the Thracian cloaks are mentioned in Greek sources as being brightly colored and decorated with geometric patterns. So, I used bolder and darker colors for most of those. Having painted several dozen plus Thracian cloaks by this point, I was struggling for inspiration for these final patterns. I decided to Google "Greek" designs and scrolled through the patterns that came up. I used that for inspiration and am pretty happy with how these came out. I purposely did NOT go back and look at the figures I'd already painted. I figured I was only painting six miniatures in this batch, I could dig deep for fresh inspiration.

    This army certainly let me exercise my creativity with their colorful cloaks and shield patterns
The Thracian caps were done in a variety of browns and red-browns. Some sources say they were made from fox skin or fur. The boots were done in a range of leather colors, too, from light to dark. These six figures actually painted up very quickly. I knew I was on a time crunch to get them done by this weekend's tournament, so couldn't dally. One thing I did do differently was switch my black and brown wash I have been using for several years. Instead of using Vallejo clear matte paint with drops of brown or black, I am trying something new. I really like the Vallejo vehicle washes, and have been using the black a lot for my Sci-Fi troops. I decided to premix a bottle of each roughly 50/50 strength with water. Do I like it better? Not sure. The previous matte with color was getting decidedly "snotty" in texture and leaving a gray-like glaze. This new concoction seems to cover more unevenly, though, and give an almost cracked look under a magnifying mirror.

I'd be happy to hear from others if they see anything negative in the brown or black wash on these figures. Otherwise, expect another update soon with how things went in this weekend's tournament. I am taking the Thracians, of course. Many highly-experienced players have signed up, though, so I was not expecting a top tier finish. My guess was I'll end up 1-2 in three games. I am a little rusty on Saga at the moment, despite Jenny and my warm up game last weekend. Note: Just came home from DayCon. I ended up 2-1, losing to Bob Boggs' Successor army and defeated Lee Parker's Milites Christi and Jenny's Eastern Princes. So, a relatively successful outing for those six brand new figures and their compatriots...!

Miniature Painting & Purchasing Tally for 2024

  • Miniatures acquired in 2024: 64
  • Miniatures painted in 2024: 47


Monday, April 1, 2024

Sci-Fi Scatter Terrain from 3 Companies

    Three Sci-Fi scatter terrain pieces (power generators?) from Diabolical Terrain
As I get closer to staging my first game of Xenos Rampant, I felt that I should paint up some of my recent acquisitions in Sci-Fi scatter terrain. These primarily came from three different sources. One is a regular attendee at area conventions -- Diabolical Terrain. Owner Ron Weaver is big into 3-D printing. I have purchased post-apocalyptic terrain from him, ruined buildings, wrecked vehicles -- you name it! Last October, he had some Sci-Fi scatter terrain on his shelves that I picked up. They are from the Lunar Kolony range. If you're interested in picking some up, Diabolical Terrain will be at DayCon 2024 in a few weeks. I know that I will likely be buying more stuff from him there!

    This large drill unit is 3-D printed from Sea Dog Games (makers of the game Sailpower)

Another vendor is a relatively local one, Sea Dog Games. The owners live in the Central Ohio area, and are regular dealers at many regional and national conventions. You've probably seen them running their large-scale sailing ship game, Sailpower. They were one of the early adopters of 3-D printing, and have quite a diverse range of terrain. Some of the modern dumpsters you see in my Mean Streets games are from Sea Dog.

    The largest of the scatter pieces I just painted (refinery?) and two smaller ones from A Critical Hit
Finally, at Cincycon 2024, I discovered a new vendor in 3-D printed terrain: A Critical Hit (link to their Instagram page). I showed a number of the things I bought from them in a blog post a week or two back. You are seeing of those painted up in this post. Blair uses a number of interesting looking colored materials in her prints, intending for them to not necessarily need painting. All of the ones in this were painted up, of course. Two of them are probably my favorite pieces from this batch of scatter terrain. I hope to keep seeing Blair and A Critical Hit at upcoming shows - great stuff!

    This is probably one of my favorite pieces of the lot - another power generator from A Critical Hit
For all of these pieces, I prepped them identically. I start with a spray of Krylon acrylic matte black. Once dry, I brush on a 50/50 mix of water and black acrylic paint to make sure all the crevices are filled. I like to use metallic paints for my Sci-Fi scatter. For example, I have four different shades of what would be considered steel. The darkest is Iron Wind Metals "Steel." Next up, are a trio of craft paint shades from Folk Art, continuing from dark to light: Gunmetal Gray to Pewter and finally, Silver. My favorite accent color is also from Folk Art and is called "Metallic Brown." 

   Another 3-D printed piece from Diabolical Terrain and another thing I'll call a power generator!
I actually purchased and used something very new that I only recently became aware of in painting. Have you heard of "color shift" paints? They go by other names, too, but typically involve the color painted on looking different (or "shifting") depending on the angle you view it and how the light strikes the painted object. I first saw it at Cincycon 2024 in a game run by John Leahy (owner of JS Wargamer Printing -- more 3-D printed goodies!). John had painted a unit of flying Arachnids in iridescent colors. He explained what color shift paints were, and said his had come from Vallejo. Another model paint maker, Turbo Dork, also makes them. At a recent visit to Michaels Crafts, I was surprised to find that the craft paint brand Folk Art also make color shift paint. I bought a bottle of their "Black Burst" to try out, because it looked like a good metallic color for scatter terrain.

    A color shift paint from Folk Art called "Black Blast" - can't really tell from the picture, though
How did I like it? Well, I feel it does gleam and reflect light more than a typical metallic paint. This was not one of the prismatic color shifting paints, though. Maybe I'll try those next. Anyway, it goes on much thicker than typical craft paint. It says it is acrylic, but it has an odd smell. Most craft paints are relatively odorless, I think. What's more, it is self-sealing, Folk Art's website says. In other words, you don't want to spray seal it. I accidentally got a bit on my thumb and can verify it did not come off when I first washed my hands. I had to specifically try to scratch and rub it off. Their website also recommends black priming first, then doing a gloss coat over the black. I did the first, but did not try the second because I didn't read their website till after I'd painted that terrain piece. More experimentation is in order, I think...

    A second look at the Diabolical Terrain (you guessed it) power generators!
Speaking of techniques, what I have begun doing on my Sci-Fi scatter terrain (or even the weapons of Sci-Fi miniatures), is to paint it gunmetal gray first. Next, I highlight areas in pewter, with only the brightest highlights in silver. Finally, I do a reasonably heavy black wash over the piece. Take a look at the really large piece in this update -- an oil tank? That demonstrates how I have been doing this type of terrain. It goes very quickly and look good on the tabletop, I feel.

Friday, March 29, 2024

Severed Heads on Posts (fatigue markers for my Thracian army)

    Some fatigue markers for my head-hunting Thracian army for Saga
One of Saga's game mechanics is fatigue on a unit. I'm a big fan of making any markers required on the tabletop "scenic." When I started playing the Dark Ages skirmish game a few years back, my first fatigue markers were extra shields I painted and glued to a flocked, circular base. As I kept playing, I have tried to get more creative or make the markers match the army in some way. For my latest army, the "barbarian" Thracians from the Hellenistic era, I decided to play off of the fact they were known in some sources as headhunters. So, why not severed heads on poles?

    Steps 1, 2, & 3: magnets on bottom of bases, glue carpet tack upright, and then first layer of flocking
Luckily, with the proliferation of plastic kit boxes for miniatures these days, the ancient wargaming world seems to rolling in extra heads. My friend Joe sent me about a dozen and they sat unused on my desk for about six months. This month, I finally decided to finish off the Thracian army and made the fatigue markers priority #1. After that, I would do the final half-dozen figures so that I don't need to proxy Pictish figures. Thanks to Joe, I had my heads, but now what do to with them?

   Step 4: Paint ballast with 50/50 white glue and water and then dip in Woodland Scenics blended turf
At Historicon last year, I bought a bunch of small circular bases to use as fatigue markers. Since I didn't have any magnets specially sized for them, I had to cut some from an adhesive magnetic sheet I'd purchased at Hobby Lobby. Once those were popped onto the bottoms, I then glued carpet tacks to the center of each. These small black nails have a rough, fluted surface that would dry brush well as wood. I used tacky glue to affix them, knowing that I'd have a couple layers of flocking on top of them to help keep them in place.

    After drilling out the bottom of the heads with a pin vice, they were glued onto the carpet tack
Next, I painted white glue onto the top of the base around the nail. I swished it around a tub of brown fine ballast from Woodland Scenics. After it was dry, I brushed on a 50/50 water and white glue mixture and sprinkled Blended Turf from the same company. Next, the markers received their first spray sealant coat. Now, it was time to affix the heads to the nails. I used a pin vice to drill out the bottom (neck area) of each head, starting with a smaller pin and then widening the hole with a bigger one. Once all heads were prepared, and one -- sadly -- was lost to the wilderness of my 1970s shag carpet in my painting area downstairs, I was ready to go.

I used model cement to attach each head to its post, not worrying about any excess dripping down the nail. That could be well, gore...right? Anyway, this went easier than I thought it would. I was worried about losing another head to the shag carpet demons! Once the heads were atop their posts, I brushed primed them white. From there, it was a simple matter to paint each head and then paint the post itself, too. I did leave out the pupil in my normal method of painting eyes, theorizing the eyes would have rolled back into the head. At least that's the way art seems to always depict severed heads.

    Finished and ready for the tabletop -- severed heads on posts as fatigue markers for Saga!
I really like the way these turned out. To anyone thinking of replicating the process, I would suggest finding heads that have their mouths open, appear to be shouting, or whatever. Mine look entirely too contemplative and philosophical about their fate as a fatigue marker. So, there you go! Progress on my Saga Thracian army AND a little tutorial on creating colorful, scratch-built fatigue markers. Feel free to take my idea and run with it...just watch out for runaway heads trying to escape to the shag carpet when prepping them!

 What's up next? Expect some Sci-Fi scatter terrain as I get prepared for my first game of Xenos Rampant (soon, I hope!)...

Miniature Painting & Purchasing Tally for 2024

  • Miniatures acquired in 2024: 64
  • Miniatures painted in 2024: 41 (note - severed heads not included in this total...ha, ha!)

Wednesday, March 27, 2024

Mounted Gorillas (and pics of all Planet of the Apes figs)


    Zoomed in view of my mounted gorilla general leading my entire Planet of the Apes force
My Planet of the Apes figures are from three different manufacturers. The first batch I ever painted, years ago, were from Eureka -- their "Boiler Suit Apes." I am assuming the name refers to the coveralls their wearing, but I could be wrong. They are excellently cast figures and very animated. My next batch I picked up were from Sgt. Major Miniatures. The line is now carried by Battle Valor Games, who picked up many other of their lines besides the Planet of the Apes figures. Thrown into the mix recently were the 3-D printed miniatures from JS Wargamer Printing. Since I had only a single pack of three Battle Valor mounted gorillas, I bought one of JS's Gorilla Cavalry packs of four figures earlier this month at Cincycon 2024.

    My five Gorilla Cavalry to round out my Planet of the Apes detachment for Xenos Rampant
How do they all mix together? Well, I would have a good chance to see that as I set out a squad of five mounted gorillas! This squad is a last-minute addition for my Planet of the Apes detachment for Xenos Rampant. I used all three of the Battle Valor metal figures and two of the JS 3-D ones. Height-wise, they looked okay together. I based all five on the pill-shaped bases I'd picked up from Litko awhile back. As I brush primed them my usual acrylic white, it was easier to some differences. The most noticeable was in head size. The proportions of the metal figures tend to be somewhat exaggerated, while those on the 3-D printed ones are sometimes a tad slender or small. My hope was that, once painted up, these differences would be lost on the eye.

    Three mounted gorillas from Battle Valor Games -- metal minis, more my style and liking
With the Battle Valor figures, I had to glue the metal rider to the horse, as usual. With the 3-D ones, it was the upper torso that needed to be glued to the lower body, which was sculpted onto the horse. Unfortunately, this pack of Battle Valor figures had the most flash I have ever had to clean off from either them or Sgt. Major. I don't know if these were old ones or new ones, but it took some major X-acto knife work to clean them up. The 3-D printed figures, of course, required no cleaning up.

   3-D printed mounted gorillas from JS Wargamer Printing - clean, slender figs...our hobby's future?
For horse colors, I pulled out my Saga Mongol army and picked out five color patterns that I liked. Why reinvent the wheel? If I have horse markings that I have done and liked, why not recycle them for another period and army? The 3-D printed horses were noticeably more slender, though, but not quite as dynamically posed as the metal ones. I really liked how all five horses looked painted up, though. So far, metal and 3-D printed were running pretty even and looking good enough together.

    Good look at my entire force of 28mm Planet of the Apes figures from three different manufacturers
It was when I got to the riders that the differences were most noticeable. The metal figures are MUCH chunkier. They have the exaggerated, raised detail common on metal miniatures that I am used to painting. The detail on the 3-D printed figures was shallower and somewhat muddier -- especially on the gorillas' faces. I know that is not a characteristic of all 3-D printed miniatures. For example, I like the ones from Wiley Games -- they seem more similar to what I am used to painting, detail-wise. It's not that I dislike the 3-D printed figures. It just seemed different - almost like I was painting 1/72 plastic figures with their shallow detail rather than 28mm ones. I think if a whole army or project was done in the 3-D printed minis, I would be fine with them. Supplementing an existing project with a pack or two of these is when you notice the differences.

    The first apes I painted up -- a force of well-armed chimpanzees from Eureka Miniatures
Will there come a day when the majority of our figures are 3-D printed rather than manufactured in the traditional sense? Perhaps. I just hope the designers retain the convention of slightly exaggerated, raised detail that makes our miniatures easier to paint. It's hard to dry brush figures with more realistic, properly scaled details, for example. I think that in many cases, plastic multipart or "kit" boxes have begun to outnumber metal ones. With the historical backlog of metal releases, choices in metal probably still outnumber those in plastic or 3-D. However, in NEW releases, I think metal has begun to fall behind. Of course, this is all my own opinion, and directed mainly at 28mm scale. In smaller scales, metal may still outnumber plastic. I'm not sure and haven't done any detailed research into it. Just rambling!

    Mounted General Urco leads my force of gorilla infantry to take over the world of humans

I painted my mounted gorillas to match my previously painted foot ones with leather armor and dark purple uniforms. Both metal and plastic painted up easily and well, I feel. All five are "rank and file" types, so no fancy leaders here. I will use them as Berserk Infantry (yeah, I know they're mounted) for Xenos Rampant. I can see the gorillas eagerly wanting to charge into close combat. I want to use a variety of troop types in my XR detachments so that I can get a good feel for how they all work. Speaking of which, I will be borrowing a couple detachments from my friend Keith at our usual Sunday evening gaming. I expect six players for my first game, so will field my own Bronze Legion, Machines, Anadorans, and Planet of the Apes forces. I expect to be making unit cards and designing a Quick Reference Sheet this week.

   Some character types - a chimp general and bodyguard, Dr. Zaius and Maurice the Orangutan
What's next? I am finally getting around to making my fatigue markers for my Saga Thracians. That will definitely be my next post. In addition, I am going to try to get some 3-D printed Sci-Fi terrain that I bought from Sea Dog Game Studios and Diabolical Terrain finished up for my first XR game, too. Stay tuned -- lots more on the way!!

    More Eureka Miniatures -- these are billed as Gibbon Monkeys and another cool set of figs!
    Another shot of my Planet of the Apes forces assembled, with the Gibbons protecting the right wing

    Maurice, Dr. Zaius, and the gorilla cavalry guard the left wing of the battleline

Miniature Painting & Purchasing Tally for 2024

  • Miniatures acquired in 2024: 64
  • Miniatures painted in 2024: 41